
Reviewed · EVENING EXPERIENCES
Private Tour: Night Photography Tour in London
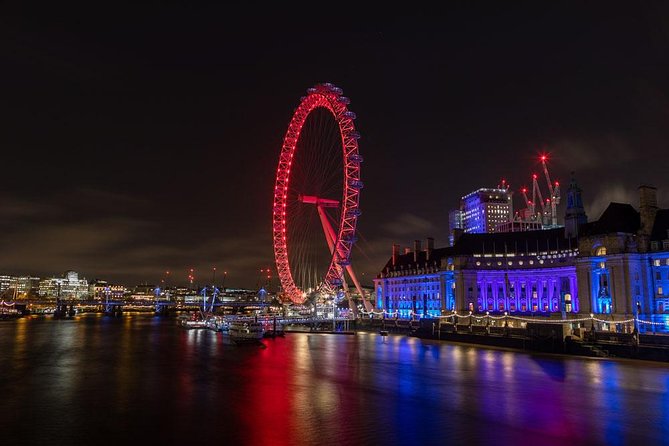
London at night looks better through a camera. This private tour walks the South Bank after dark with a fine art photographer, so you get help finding angles and camera settings without feeling lost in a sea of people.
I really like the hands-on, you-go-at-your-pace instruction as you work around the London Eye and Westminster viewpoints. One thing to consider: bring a fully charged battery (and ideally a spare), because you’re out in real weather and night work often asks more from your gear than daytime shooting.
In This Review
- Key highlights you’ll feel during the walk
- Why this private night photo tour works in London
- Price and value: what $337.60 per person is buying
- Meeting point, timing, and how the 3 hours flow
- South Bank: building your night photo foundation
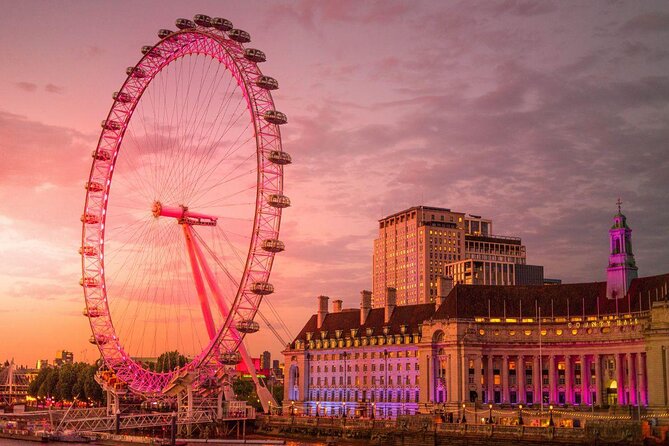
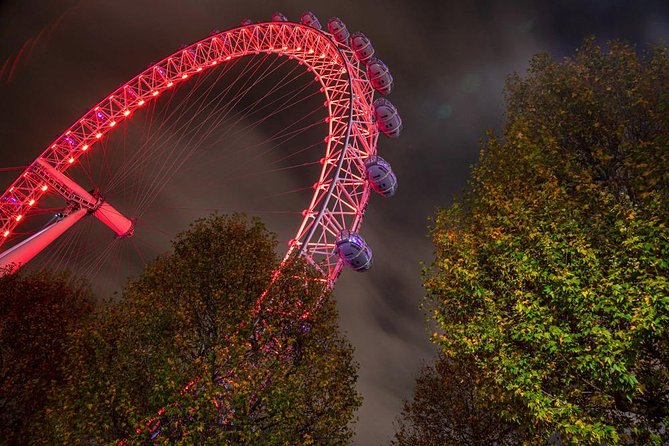
- London Eye stop: slow exposures that make the structure feel alive
- Thames River toward Jubilee Bridge: reflections, illuminated buildings, and water effects
- Golden Jubilee Bridges: the elevated framing lesson for Westminster
- Royal Festival Hall: skateboard park action plus atmospheric slow exposure
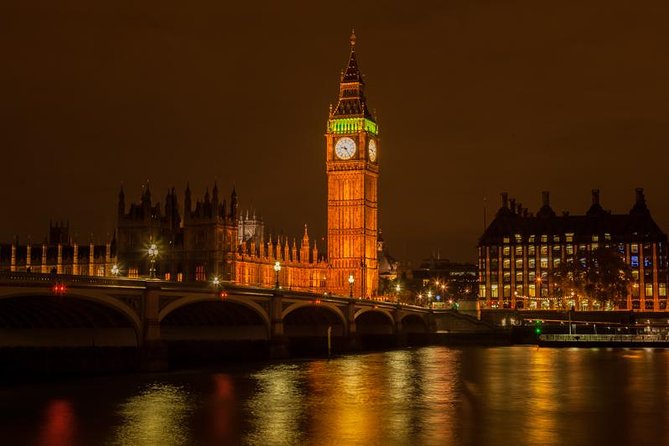
- Big Ben across the river: mood, atmosphere, and clean compositions
- Houses of Parliament: translating history into a night scene
- Westminster Bridge: traffic light trails and the joy of motion
- Victoria Embankment: finishing with the full London Eye circle and reflections
- The pro teaching style: what Lou’s approach is known for
- Bring this gear, and you’ll enjoy the night more
- Who should book this (and who might not need it)
- Should you book this London night photography tour?
- FAQ
- How long is the night photography tour?
- Where do I meet, and where does the tour end?
- Is the tour private?
- What’s included in the price?
- Do I need a tripod?
- What camera types and skill levels does it work for?
- Can I cancel for a full refund?
Key highlights you’ll feel during the walk
- Private, tailored coaching aimed at your camera and your skill level
- Slow-exposure practice for the London Eye, bridges, and traffic light trails
- South Bank landmark coverage with landmark framing and composition help
- River reflection techniques using long exposures for glassy water effects
- Action + long exposure at Royal Festival Hall (freezing movement, then smoothing it)
- Pro feedback on your results, plus guidance for what to try next
Still deciding? A handful more London outings we rated
- Harry Potter Studios & Private Transfer from Central London
★ 4.5 · 6,134 reviews - The Premier Classic London: Private 4-Hour Tour in a Black Cab
★ 5.0 · 2,737 reviews - Stonehenge Inner Circle Private Tour from London with Bath Visit
★ 5.0 · 1,909 reviews - Private Tour: Black Taxi Tour of London
★ 5.0 · 1,153 reviews
Why this private night photo tour works in London
Night photography in London can feel like two problems at once: the light changes fast, and it’s easy to get disoriented by where you’re standing. This tour solves the first part by teaching you how to control your camera for darkness, and the second part by keeping a steady walking flow between the best-lit spots.
What makes it different from a casual photo walk is the teaching style. You’re not just told where to point your lens. You’re guided on how to see a scene in layers—sky glow, building edges, reflections, and the way moving traffic turns into light trails.
And because it’s private (you or your group only), you’re not stuck waiting for someone else to finish a question. You can stop, test, adjust, and move on when your photos start looking the way you want.
Price and value: what $337.60 per person is buying
$337.60 per person is not a budget gamble, so you should think about what’s included. You’re paying for three things that usually cost extra if you try to cobble them together:
- A professional fine art photographer who teaches and adjusts to your camera
- Hands-on guidance at the actual viewpoints, not just theory
- A photograph review and next-step coaching to help you improve beyond the walk
You also get strong location value. The route hits multiple big-name areas—South Bank, London Eye, Thames viewpoints, and bridges—plus spots where you can experiment with both still scenes and movement.
If you’re the type who wants great night images but also wants to understand how to get them again later (at home or on another city trip), this format is a solid match.
If you only want a few souvenir shots and don’t care about learning settings, you might feel the cost more than the benefit. In that case, a simpler guided stroll could fit better.
Meeting point, timing, and how the 3 hours flow
You meet near the London Eye Waterloo Pier (London 1SW1A 1AE) and you end near Westminster Station (Underground Ltd, Bridge St, London SW1A 2JR). The tour is about 3 hours, and the stops are designed like a sequence of practice sessions: establish the skyline, work the long exposures, then add reflections, then finish with bridges and motion.
Expect a leisurely walking pace. You’ll spend time at each focus area—typically 15 to 45 minutes—so you can test settings and angles rather than just snapping and sprinting.
The tour runs in all weather, so dressing matters. Night photos look best when you can stay steady, stay warm, and keep your hands working your camera without fiddling every two minutes.
Still deciding? A handful more London outings we rated
South Bank: building your night photo foundation
The first stop is the South Bank, where you start with the kind of London scene night photographers dream about: glowing buildings and major structures lining the river.
You’ll photograph the Big Ben area and the Houses of Parliament views, with the London Eye sitting in the skyline. This part matters because it trains your eye for composition before you get heavy on technical tricks. A pro fine art photographer can show you how to frame edges, balance the density of lights, and avoid the common problem of turning everything into one bright blur.
A practical win here: you’re not wandering without help. You’re guided to photogenic spots along the Thames with “personal photographer on hand at all times” support, so you can focus on what your camera is doing, not where your feet are going.
Also, this stop is a great place to confirm you know how your camera behaves at night. If you’re still figuring out where key controls are, you’ll get time to get unstuck early.
London Eye stop: slow exposures that make the structure feel alive
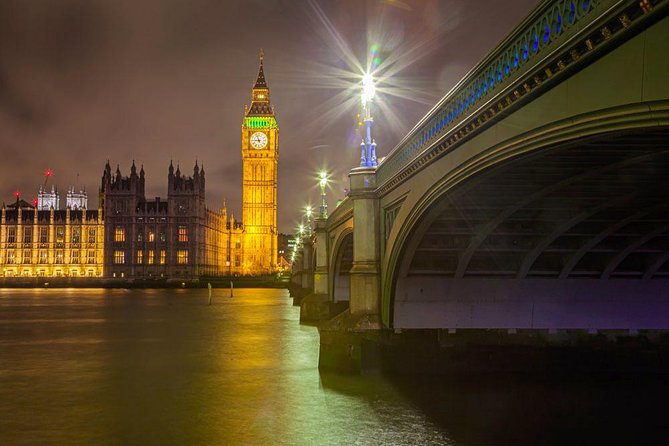
Next you move to the London Eye for a longer session focused on long exposures and experimenting with how exposure time changes your results.
You’ll work on the Eye as it rotates, and the goal is to learn how to set your camera for slow exposures so the Eye looks alive instead of static. You also practice adjusting exposure times to change the character of the image—how much light trails show up, and how the scene smooths out.
This is where the tour helps you move from random night shooting to intentional night shooting. Rather than guessing, you’re learning why your shutter speed choice changes the “feel” of lights and motion.
If you’re there during warmer summer months, the tour includes time that can support blue hour and twilight-style photography. Even if you’re not there specifically for that, the teaching still applies because it’s about managing low light and color.
Thames River toward Jubilee Bridge: reflections, illuminated buildings, and water effects
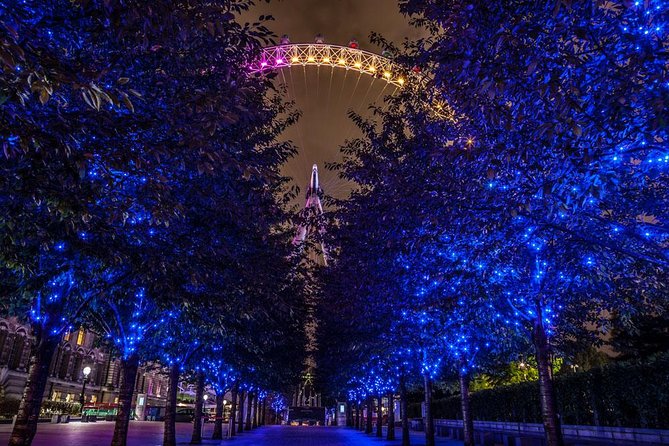
From the London Eye area you head along the river route toward Jubilee Bridge. This stretch is shorter, but it’s packed with the kind of photo opportunities night photography thrives on.
You’ll aim for strong views of the Thames and the Westminster skyline, including illuminated structures like Royal Festival Hall, the National Theatre, and the British Film Institute. These buildings give you textured light sources—useful for practicing how your camera handles contrast.
The key lesson here is reflection work. You’ll learn how to capture color reflections and use long exposures to create that glass-like water look. This matters because it’s one thing to photograph a skyline; it’s another to photograph the skyline and its mirror, which is usually where night images start feeling cinematic.
You’ll also photograph people and places along the colorful river route. That adds energy, but it’s also a chance to practice moving from “light-only scenes” to “light with real life.”
Golden Jubilee Bridges: the elevated framing lesson for Westminster
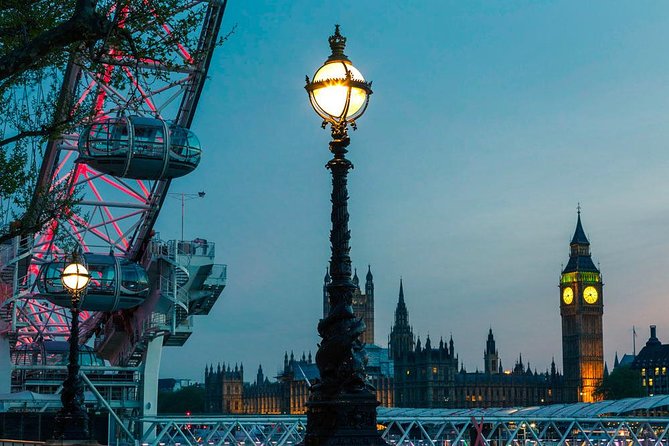
At the Golden Jubilee Bridges, you get a vantage point that helps you see the city in layers—bridges, river, and multiple iconic buildings all in one frame.
You’ll learn framing and composition from an elevated viewpoint. That’s useful because river scenes often demand a different composition approach than streetscapes. From above, you can simplify lines, position the horizon of lights, and make your skyline feel structured instead of chaotic.
You’ll work on views of Westminster, the Houses of Parliament, the London Eye, Big Ben, and St Paul’s Cathedral. With that many landmarks available, the instructor’s role gets more important: they’ll help you choose angles so your photo isn’t trying to include everything.
This is also a good stop for people who want “big London” shots but don’t want to rely on one perfect postcard angle. You can experiment and learn what works.
Royal Festival Hall: skateboard park action plus atmospheric slow exposure
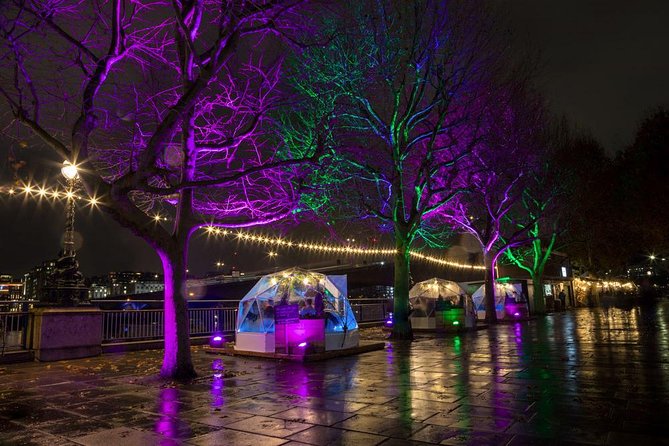
Royal Festival Hall brings a fun twist. Instead of only photographing buildings and bridges, you shift to photographing action in a colorful skateboard park setting.
You’ll learn how to freeze action while also trying atmospheric slow exposures. That’s a rare combo, and it’s valuable because it teaches you that night photography isn’t only about tripods and stillness. It’s also about how to handle movement with your camera.
This stop is shorter, so keep your battery habits tight and be ready to test quickly. The pro guidance helps you figure out how your camera responds when subjects move and lights streak.
If you like variety, this is the stop that usually gets your attention right away.
Big Ben across the river: mood, atmosphere, and clean compositions
Then you return to a Big Ben-focused perspective from across the river with the Houses of Parliament nearby.
This segment is about turning a famous subject into a moody night image. You’ll learn how to create mood and atmospheric photos by framing and composing like a fine art photographer, not like a tourist with a checklist.
The practical benefit: you’ll get guidance on how to position Big Ben so it fits your scene and doesn’t just look like a bright tower. In night photography, bright objects often become too dominant; composition fixes that.
Spending time here also lets you compare earlier shots of similar viewpoints. You can test what happens when you change angle or exposure length and see how your own results improve.
Houses of Parliament: translating history into a night scene
At the Houses of Parliament stop, the focus shifts toward composition that connects the building’s importance with modern night London.
You’ll learn how to render the essence of history while still making the image feel like it belongs to the present night lighting. In practical terms, that means controlling how the building lights interact with the sky and nearby glow from the river area.
This is a good pause to refine your style. If your first set of photos looks too “every light is equal,” this is where you can build hierarchy—strong subject, supporting glow, and a background that doesn’t steal the show.
You’ll also get chances to breathe and shoot with more intention because this stop’s goal is clarity, not hurry.
Westminster Bridge: traffic light trails and the joy of motion
At Westminster Bridge, you’ll experiment with slow shutter speeds to capture flowing night trails from moving traffic.
This is one of the most satisfying exercises in any city at night because you can see your choices instantly. Faster settings tend to reduce streaks; slower ones let light travel draw across the frame. The tour gives you the coaching to try different approaches so you understand what you’re controlling.
You’ll practice composing so the trails lead the eye through the scene instead of just floating randomly. A bridge scene can easily become messy, so guidance here really helps.
Victoria Embankment: finishing with the full London Eye circle and reflections
The final major stop is Victoria Embankment, where you photograph the London Eye from across the river for the full circular experience.
You’ll learn how to use light and colour and slow exposures to suggest movement. The teaching isn’t abstract; it’s tied to what you’re pointing at right now—the curve of the Eye, the river’s reflectivity, and how your exposure choice affects both.
You’ll also focus on framing and capturing reflections in the water. This finish matters because by the time you reach the Embankment, you’ve already had multiple practice rounds with long exposures, so your second attempt is usually stronger than your first.
You’ll end near Westminster Tube, which makes it easy to keep going with dinner or an evening walk—without feeling like your tour dragged on too long.
The pro teaching style: what Lou’s approach is known for
A lot of people mention a guide named Lou, and the common thread is how she works with cameras. She’s described as calm and patient, and she helps with settings during the walk so you can actually use what you’re learning instead of just listening.
The most useful part for many photographers is that the instruction is geared toward the camera you own. That matters because compact cameras, mirrorless, and DSLRs behave differently at night, and a one-size lesson can leave you frustrated when your camera doesn’t match the example.
You’ll also get help with building compositions at the landmarks, not just technical exposure. That combination—creative framing plus practical camera control—is why people come away feeling they can shoot again on their own.
There’s also a photograph review as part of the included experience. Even if you’re not sure what you want to improve, that feedback can point you to what to practice next.
Bring this gear, and you’ll enjoy the night more
You should bring your own camera, plus a fully charged battery and/or a spare. The tour is short, and you’ll want enough power to test exposures and review results without the panic of a dying battery halfway through.
A tripod is recommended for night photography. If you don’t travel with one, you can contact the provider after booking to arrange a tripod rental.
Also bring extra memory cards if you have them. Night photography tends to mean you’ll take more frames while testing exposure time, angles, and compositions.
Clothing tip is simple: dress for being outside for about three hours in weather that may not be pleasant. Night photos look best when you’re comfortable enough to hold your camera steadily and keep shooting.
Who should book this (and who might not need it)
You’ll get the best value if you want to learn how to take better night photos and you’re open to practicing in real locations with real lighting.
This tour suits:
- People who shoot with compact cameras through DSLR
- Beginners who want to get out of auto mode and learn how to control night results
- Intermediate photographers who want structured practice at famous viewpoints
- Anyone who likes both skylines and motion (light trails, movement, reflections)
It might not be the best match if you only want quick snaps. The tour is built around learning exposure choices and composition, so it’s most rewarding when you care about the craft, not just the photo.
Should you book this London night photography tour?
If you’re willing to work for great results—testing, adjusting, and learning on the go—this is an excellent way to spend an evening in London. The route hits the places that matter for night photography, and the pro fine art guidance helps you turn landmark scenes into images you’ll be proud to print.
Book it if you want private, camera-specific coaching and you’d like feedback on what you’re getting. Skip it (or rethink the plan) if you want a very low-effort stroll with minimal shooting practice.
If you’re on the fence, consider this your “learn it once, reuse it everywhere” night: you’ll finish knowing how to approach London at night with a lot more confidence than when you started.
FAQ
How long is the night photography tour?
It runs for about 3 hours.
Where do I meet, and where does the tour end?
You start near London Eye Waterloo Pier and end near Westminster Station.
Is the tour private?
Yes. It’s a private tour, exclusive to you or your personal group.
What’s included in the price?
You get a professional fine art photographer, photography review and skill development guidance, and the photography walking tour itself.
Do I need a tripod?
A tripod is recommended for night photography. You can contact the provider after booking to ask about tripod hire.
What camera types and skill levels does it work for?
It’s suitable for all types of cameras from compact to DSLR, and for all skill levels.
Can I cancel for a full refund?
Free cancellation is available if you cancel at least 24 hours in advance for a full refund. If you cancel less than 24 hours before, the amount paid is not refunded.
More Private in London
- Harry Potter Studios & Private Transfer from Central London
★ 4.5 · 6,134 reviews - The Premier Classic London: Private 4-Hour Tour in a Black Cab
★ 5.0 · 2,737 reviews - Stonehenge Inner Circle Private Tour from London with Bath Visit
★ 5.0 · 1,909 reviews - Private Tour: Black Taxi Tour of London
★ 5.0 · 1,153 reviews - Private London Arrival Transfer – Airport to Hotel / Accommodation
★ 3.5 · 1,085 reviews
More Tours in London
- From London: Harry Potter Warner Bros Studio Tour
★ 4.7 · 26,588 reviews - Magical London: Harry Potter Guided Walking Tour
★ 4.7 · 22,044 reviews - London: Warner Bros. Studio Harry Potter Tour & Branded Bus
★ 4.7 · 19,194 reviews - London Big Bus Hop-On Hop-Off Tour with Optional River Cruise
★ 3.5 · 10,803 reviews - London Small Group Tour of Historical Pubs
★ 5.0 · 10,422 reviews
More Tour Reviews in London
- From London: Harry Potter Warner Bros Studio Tour
★ 4.7 · 26,588 reviews - London: Westminster to Greenwich River Thames Cruise
★ 4.5 · 22,836 reviews - Magical London: Harry Potter Guided Walking Tour
★ 4.7 · 22,044 reviews - London: Madame Tussauds London
★ 4.6 · 20,915 reviews - London: Warner Bros. Studio Harry Potter Tour & Branded Bus
★ 4.7 · 19,194 reviews
Just reviewed around London
Evening Experiences, compared.
 ★ 4.5London by Night Sightseeing Open-Top Bus TourFrom $295,516 reviews
 ★ 4.4River Thames Evening Cruise with Bubbly and CanapésFrom $372,493 reviews
 ★ 4.5London by Night Bus Tour with Christmas Lights and Live GuideFrom $412,040 reviews
 ★ 4.9Jack the Ripper Evening Walking TourFrom $331,449 reviews
 ★ 4.5London by Night Sightseeing Tour – Open Top BusFrom $401,060 reviews
 ★ 4.5London by Night Sightseeing Open Top Bus Tour with Live GuideFrom $40977 reviews
 ★ 4.0River Thames Evening Cruise with Sparkling wine and CanapésFrom $45569 reviews
 ★ 4.0Tootbus London by Night Bus TourFrom $37302 reviews
Browse the lists this tour appears in