
Reviewed · HISTORICAL TOURS
History of London Photography Tour
London looks different when someone teaches your lens. This short walk focuses on composition and lighting as you photograph real City landmarks and quieter back corners.
Two things I like a lot: you get a professional photographer guide walking with you, and you also get practical prompts on how to frame what you already recognize. One thing to consider: if you’re expecting only rare, off-the-map views, the route leans toward iconic architecture—just shot in smarter ways.
In This Review
- Key moments you’ll get from the walk
- Why this 2-hour London photo walk is such good value
- Start at St. Mary Woolnoth: church lines in the City of London
- Royal Exchange and the Bank of England: learn to shoot “serious” architecture
- Guildhall’s Gothic details and St Mary-le-Bow’s bell tradition
- St. Paul’s Cathedral: a national icon that rewards smarter framing
- The National Firefighters Memorial: drama without gimmicks
- Millennium Bridge and Tower Bridge: leading lines plus panoramic payoff
- Tate Modern as the ending shot: industrial brick meets modern art energy
- What you’re really learning (beyond where to point your camera)
- Price and logistics: the small details that shape your experience
- Who should book this City of London photo tour?
- Should you book this London photography tour?
- FAQ
- Do I need a camera to join the tour?
- How long is the London photography tour?
- Where do I meet and where does the tour end?
- Is admission to the stops included?
- Is the tour suitable for children?
- What if the weather is bad?
- Is the experience refundable if I cancel?
Key moments you’ll get from the walk
- A pro photographer guiding your camera settings and angles (not just watching buildings)
- St. Mary Woolnoth’s long timeline—including Roman and pagan religious traces below the current church
- City-of-London power buildings like the Royal Exchange and the Bank of England, approached for angles and details
- Gothic drama at Guildhall plus a very London vibe at St Mary-le-Bow and its bells tradition
- St. Paul’s and the Millennium Bridge pairing for scale, silhouettes, and leading lines
- Tate Modern’s brutal, brick-and-industrial photo potential as the finish point
Still deciding? A handful more London outings we rated
- London Small Group Tour of Historical Pubs
★ 5.0 · 10,422 reviews - Soho Music & Historic Pubs Tour
★ 5.0 · 1,993 reviews - London: Historic Pubs of Central London Walking Tour
★ 4.9 · 1,065 reviews - London: Soho Music and Historic Pubs Walking Tour
★ 4.9 · 836 reviews
Why this 2-hour London photo walk is such good value
This is the kind of tour that helps you stop taking the usual postcards and start taking images that feel intentional. You’re not stuck in a museum room either. You’re walking, looking up, looking sideways, and learning why certain angles work better than others.
At $71.63 for about two hours, the math makes sense because you’re paying for live guidance—someone to help you slow down and see. Plus, the stops are marked with free admission tickets, so you’re not stacking extra entry costs on top. If you show up with a camera (or at least a phone you’re willing to learn from), you’re set.
The group is kept to a maximum of 18, which is big enough to feel social but small enough that a guide can still help you with your frame and settings.
Start at St. Mary Woolnoth: church lines in the City of London
Your walk begins at IMPRINT Church London: St Mary Woolnoth (10–13 Lombard St, EC3V 9AN). This church sits in the financial heart of London, and the story goes way deeper than most people expect.
The site has been used for worship for at least 2,000 years, and traces of Roman and pagan religious buildings have been found under the present church’s foundations. The current church was rebuilt in 1727, commissioned from architect Nicholas Hawksmoor. That mix—ancient layers plus early-18th-century design—gives you plenty to photograph: facades, stonework textures, and steeple geometry that looks great even in flat light.
You’ll have about 10 minutes here, so aim to work fast. Don’t try to capture everything. Pick one strong subject (steeple lines, doorway detail, or an angle that shows the church’s position in the street canyon) and make it count.
Royal Exchange and the Bank of England: learn to shoot “serious” architecture
Next up is the Royal Exchange Building. It’s one of those places that looks impressive at a distance, but becomes even better when you photograph it like a pattern—repeating windows, edges, and symmetry that you can control with your position.
Then you move to the Bank of England, which is described as packed with history and architecture worth hunting for angles. This is exactly the kind of stop where a photographer guide pays off. You don’t just point your lens at a wall and hope. You get taught to find vantage points, pick lines that lead the eye, and adjust for how tall buildings distort perspective.
You’ll spend about 10 minutes at the Royal Exchange and 15 minutes at the Bank of England. The time matters. You’ll likely get a couple of different lighting moments as you reposition—so take a few minutes to step back, change height, and try one wider frame and one detail shot.
Still deciding? A handful more London outings we rated

Guildhall’s Gothic details and St Mary-le-Bow’s bell tradition
At Guildhall, you get a shift to Gothic grandeur. It’s described as about 800 years old, which means you’re photographing something that looks carved into London’s identity. This is one of the best stops for learning how to shoot ornate stone without getting overwhelmed.
The trick with Gothic architecture is to simplify your composition. Instead of trying to capture every carving, look for repeating shapes and strong silhouettes. Frame the building’s height, then take a second shot emphasizing detail—like a section of stonework—so you’re covering both “scale” and “texture.”
You then head to St. Mary Le Bow Church, with a very London character built into the story. There’s a tradition that true Cockneys are born within earshot of the bells. Even if you’re not testing that legend in real time, it gives the location personality, and personality makes photos feel less generic.
This stop is about 10 minutes, so treat it like a quick portrait session for a landmark: one wide shot that shows the church in context, plus a second image with the angle that feels most like London to you.
St. Paul’s Cathedral: a national icon that rewards smarter framing
Then comes St. Paul’s Cathedral, and this stop is loaded with landmark moments people connect to instantly. The tour notes events such as:
- the marriage of Catherine of Aragon to Prince Arthur in 1501
- Queen Elizabeth I visiting after the Spanish Armada defeat in 1588
- and the story tied to Guy Fawkes and the plot against James I
Even if you don’t memorize dates, those references help you photograph with meaning, not just angles. You’re working with a building that has been present for huge parts of British history, so your photos will feel more grounded if you’re deliberate.
You’ll have about 20 minutes at St. Paul’s, which is the longest stop—so use it well. Start with an overview shot to place the cathedral in its setting, then spend time finding the best line of sight for height. If you can, try one shot where the cathedral is crisp and vertical, and another where surrounding streets frame it like a stage.
The National Firefighters Memorial: drama without gimmicks
After St. Paul’s, you’ll see the National Firefighters Memorial, created by sculptor John Mills. It commemorates firefighters who helped London survive the Blitz—described as professionals, men and women, with Winston Churchill’s phrasing about heroes with grimy faces.
This stop changes the tone. Instead of pure architecture, you’re photographing a statue set among major landmarks. That means you can play with mood: dramatic shadows, strong contrast, and a composition where the memorial feels like the emotional center while the city fills the background.
You get about 10 minutes here. If the light is harsh, look for a side angle that adds shape to the sculpture. If the light is softer, use the background landmarks as a gentle frame.
Millennium Bridge and Tower Bridge: leading lines plus panoramic payoff
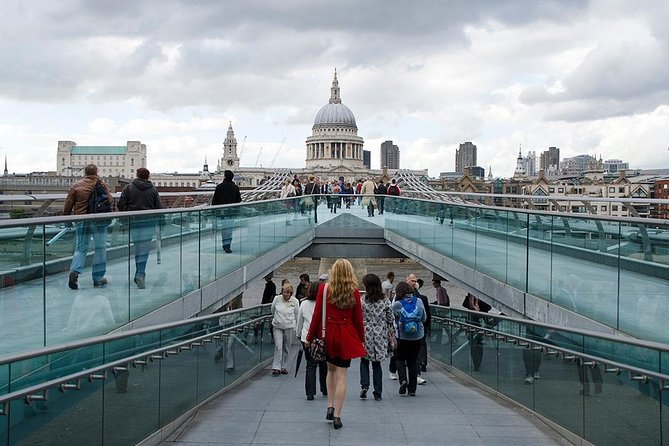
Next is Millennium Bridge, opened June 10, 2000. It links Tate Modern with the City of London and St Paul’s Cathedral. At about 325 meters long, it’s made for leading lines—an instant way to guide the eye across the frame.
You’ll have about 10 minutes. This is where you can practice a simple skill: align the bridge span so it creates a vanishing point or a clean diagonal through the image. If you shoot from one end, try a wide frame. Then move a bit and shoot a tighter crop where the bridge occupies more of the composition.
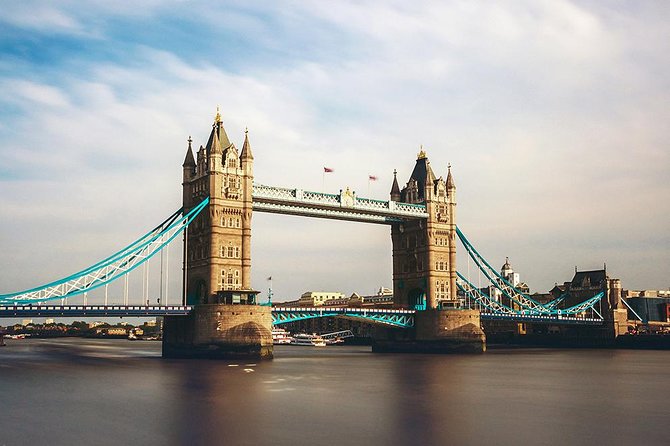
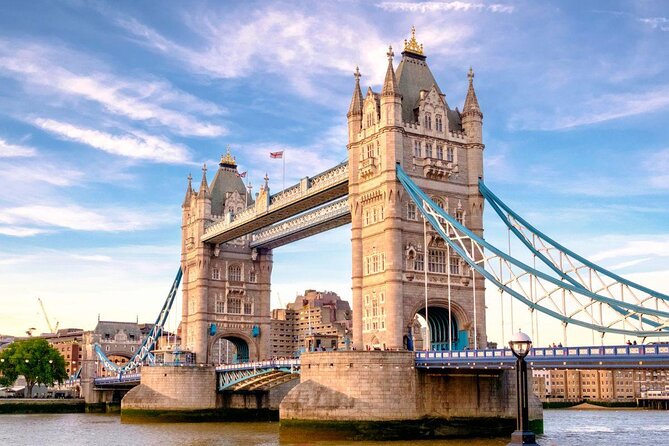
After that, you reach Tower Bridge. The focus here is panoramic views of the River Thames and the bridge itself. Tower Bridge is photo-friendly, but it can also become cluttered if you include too much.
Spend your time choosing what story you want:
- river-first (movement, reflections if conditions allow)
- bridge-first (shape and structure)
- skyline-first (scale and London density)
You’ll have about 10 minutes for this, so don’t wander too far. Get your angles quickly, then refine.
Tate Modern as the ending shot: industrial brick meets modern art energy
Your walk finishes at Tate Modern at Bankside (London SE1 9TG). It’s described as housed in the former Bankside Power Station, designed by Sir Giles Gilbert Scott, who also designed Battersea Power Station. It’s also noted as Britain’s national gallery of international modern art.
For photography, this matters because you get both architecture and atmosphere. The building’s brick presence and big modern forms can look powerful in the frame, especially if you shoot with strong lines and bold contrast. This stop is also practical because it gives you a clear finish point after moving through churches and “old stone” landmarks.
You get about 10 minutes here. Use it to create a final image that feels like the walk’s theme: London’s layers—old and industrial, symbolic and graphic—captured with your own style.
What you’re really learning (beyond where to point your camera)
This tour isn’t just about snapping. It’s about thinking like a photographer while you’re walking in the street.
The included focus is professional photography advice, plus guidance on composition and lighting. In plain terms, that means you should expect to adjust your approach—changing where you stand, when you shoot, and how you frame the subject so it tells a clearer story.
One review highlighted that the guide helps people catch up on camera settings before the walk starts. Another review described a relaxed style and hands-on encouragement for different abilities. Even if you’re using an SLR on automatic right now, this kind of guidance can help you push beyond autopilot and start choosing settings on purpose.
Also, since the group size is capped at 18, you’re not likely to feel lost in a crowd. You should get enough attention to make at least a couple of meaningful changes to how you photograph.
Price and logistics: the small details that shape your experience
Let’s talk value in a realistic way. You’re paying $71.63 for roughly two hours with a guide and multiple stops. The experience includes a guided walk, pro-led photo opportunities, and historical context. On top of that, the stops are listed with free admission tickets.
So your “extra costs” are mostly just your own choices—coffee, transit, and whether you decide to print anything afterward.
A few practical notes that can affect your day:
- You’ll want a camera or camera phone. The tour itself is photography-centered, and the guidance is meant to be used while you’re there.
- The tour requires good weather. If it’s canceled for poor weather, you’ll be offered a different date or a full refund.
- It’s minimum age 18. Children must be accompanied by an adult who has paid.
- Service animals are allowed, and it’s near public transportation.
- You’ll get a mobile ticket.
One more consideration: the route is packed with famous architecture. If you’re chasing only ultra-rare viewpoints, you may find this tour plays more to familiar sights shot from smarter angles.
Who should book this City of London photo tour?
This is a great fit if you want:
- a short, efficient London experience that still teaches you something
- an easy way to photograph major landmarks without wandering alone
- help with settings, framing, and learning how to see differently as you walk
It’s also a solid pick for locals who want a fresh angle on places they’ve passed a hundred times. The tour’s structure pushes you to notice how buildings sit in their streets—how your height, position, and timing change the photo.
If you already shoot professionally and expect a super-technical workshop with deep post-processing guidance, this may feel too compact. But for most people—especially anyone who wants a fun, guided photo walk that actually improves their results—it’s a strong choice.
Should you book this London photography tour?
Yes, if you want a low-stress, high-learning way to photograph London’s City and river landmarks in one compact session. The price-to-time ratio feels fair because you’re not paying for entrances, and you’re paying for real guidance while you shoot.
Hold off or set expectations if you’re hunting for only obscure, offbeat angles. This walk is built around recognizable architectural anchors, then uses pro framing and composition advice to make those familiar sights look new.
If your goal is to leave with better photos and a clearer sense of how to shoot what you see, this is the kind of tour that helps you do that—without turning your day into a complicated project.
FAQ
Do I need a camera to join the tour?
You’ll get the most out of the experience if you bring a camera or camera phone. The tour is designed around photographing stops while the professional guide shares advice.
How long is the London photography tour?
The tour lasts about 2 hours.
Where do I meet and where does the tour end?
You start at IMPRINT Church London: St Mary Woolnoth, 10–13 Lombard St, London EC3V 9AN. The tour ends at Tate Modern, Bankside, London SE1 9TG.
Is admission to the stops included?
The tour schedule lists each stop with admission ticket marked as free.
Is the tour suitable for children?
The minimum age is 18. Children must be accompanied by an adult, and both must have paid tickets.
What if the weather is bad?
This experience requires good weather. If it’s canceled due to poor weather, you’ll be offered a different date or a full refund.
Is the experience refundable if I cancel?
No. The experience is non-refundable and cannot be changed for any reason. If you cancel or request an amendment, the amount you paid will not be refunded.
More Historical Tours in London
- London Small Group Tour of Historical Pubs
★ 5.0 · 10,422 reviews - Soho Music & Historic Pubs Tour
★ 5.0 · 1,993 reviews - London: Historic Pubs of Central London Walking Tour
★ 4.9 · 1,065 reviews - London: Soho Music and Historic Pubs Walking Tour
★ 4.9 · 836 reviews - Royal Historic Pubs Walking Guided Tour in London
★ 5.0 · 803 reviews
More Tours in London
- From London: Harry Potter Warner Bros Studio Tour
★ 4.7 · 26,588 reviews - Magical London: Harry Potter Guided Walking Tour
★ 4.7 · 22,044 reviews - London: Warner Bros. Studio Harry Potter Tour & Branded Bus
★ 4.7 · 19,194 reviews - London Big Bus Hop-On Hop-Off Tour with Optional River Cruise
★ 3.5 · 10,803 reviews - London Small Group Tour of Historical Pubs
★ 5.0 · 10,422 reviews
More Tour Reviews in London
- From London: Harry Potter Warner Bros Studio Tour
★ 4.7 · 26,588 reviews - London: Westminster to Greenwich River Thames Cruise
★ 4.5 · 22,836 reviews - Magical London: Harry Potter Guided Walking Tour
★ 4.7 · 22,044 reviews - London: Madame Tussauds London
★ 4.6 · 20,915 reviews - London: Warner Bros. Studio Harry Potter Tour & Branded Bus
★ 4.7 · 19,194 reviews
Just reviewed around London

Historical Tours, compared.
 ★ 5.0London Small Group Tour of Historical PubsFrom $4010,422 reviews
 ★ 5.0Soho Music & Historic Pubs TourFrom $441,993 reviews
 ★ 4.9Historic Pubs of Central London Walking TourFrom $391,065 reviews
 ★ 4.9Soho Music and Historic Pubs Walking TourFrom $39836 reviews
 ★ 5.0Royal Historic Pubs Walking Guided Tour in LondonFrom $44803 reviews
 ★ 5.0Private Group: Historical Pub Walking Tour of LondonFrom $173660 reviews
 ★ 4.6Rock ‘n’ Roll History TourFrom $74645 reviews
 ★ 4.7Westminster Abbey Tour with a Royal Heritage GuideFrom $93614 reviews
Browse the lists this tour appears in