
Reviewed · WORKSHOPS
Enamel Jewellery Making Class in London
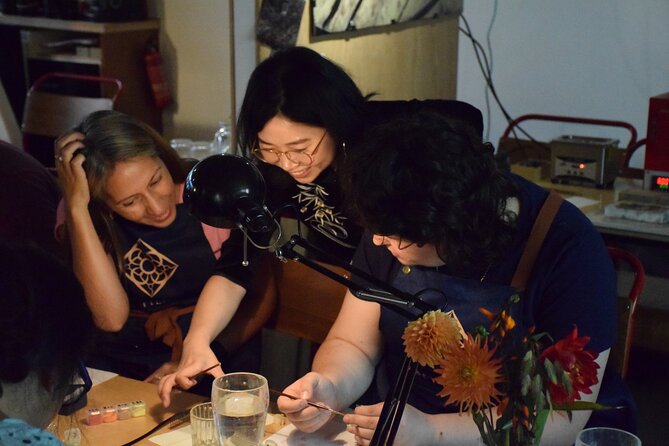
Make jewelry with fire and color. This hands-on enamel class in London turns a flat silver blank into a finished pin or necklace using real enamel tools and a kiln, all in about two hours. I like that the session is taught in a very small setting (normally no more than four), so you get real guidance instead of watching from the sidelines.
I also like that the workshop is built for beginners: you’ll get a quick enamel crash course, pick from 40 designs, sketch your layout, then get one-on-one help with enamel powder color blending and layering. One thing to consider: on special dates the group can run bigger than the usual intimate studio size, so focus can feel less “one-on-one” than on a regular day.
In This Review
- Key highlights to know before you go
- Enamel Jewellery Making in London: why this class is such good value
- The 2-hour flow: from silver blank to polished wearable
- 1) Start with enamel basics and the style overview
- 2) Materials and tools: what you’ll use (and what that means)
- 3) Choose your blank design: 40 options to pick from
- 4) Design and sketch before you touch enamel
- 5) One-on-one guidance: enamel powder, color blending, and layering
- 6) Kiln time: baking the enamel
- 7) Finishing and polishing: the final “how it should look” step
- What you actually learn: cloisonné basics without the heavy jargon
- Tools, inclusions, and the extras that cost money
- Where it happens: Zoey Filigree in Bedlam Mews (SE11 6DF)
- Group size reality: intimate most days, bigger on special dates
- Who should book this enamel jewellery class
- Price and value: is $94.10 a fair deal?
- Should you book this enamel jewellery making class?
- FAQ
- How long is the enamel jewellery class in London?
- What group size can I expect?
- Where do I meet for the workshop?
- Is the class offered in English?
- Is a mobile ticket provided?
- What’s included in the $94.10 price?
- What extras cost extra?
- When will I get confirmation after booking?
Key highlights to know before you go
- Small-group learning with hands-on instruction, usually up to four in the studio
- All tools and materials included, including the kiln and rotary micromotor
- Pick from 40 blank designs, then file, sketch, enamel, and finish
- Guidance on color blending and layering (great for first-timers)
- You leave with a finished piece after baking and polishing
Still deciding? A handful more London outings we rated
- London: Traditional English Scone Making and Tea Workshop
★ 5.0 · 702 reviews - London: East End Street Art Tour and Spray Painting Workshop
★ 4.8 · 297 reviews - London Traditional English Scone Making and Tea Workshop
★ 5.0 · 271 reviews - London: Half-Day Street Art Tour and Workshop
★ 4.9 · 172 reviews
Enamel Jewellery Making in London: why this class is such good value
If you like crafts that turn into something you can wear right away, this workshop fits the bill. Enamel jewelry is one of those arts where the “wow” comes from a process you can actually learn in a short session: metal + carefully placed powder + kiln firing + finishing. You’re not just making a souvenir. You’re making a skill you can reuse later.
The price point is also easier to justify than many “do it yourself” activities. At $94.10, you’re not paying just for supervision. You’re paying for the tools and consumables, plus the equipment that most craft classes would make you wait for or schedule separately. They include the kiln and the practical tools you need to shape and finish your piece, which is the expensive part of the workflow.
And because the class is designed for newcomers, it’s not intimidating. You’ll learn what enamel is, what makes it behave differently than paint or glaze, and how the different enamel styles work at a basic level. That background helps when you’re deciding what colors to use and how thick to build the layers.
The 2-hour flow: from silver blank to polished wearable
This class is short on purpose. It’s built around a clear sequence, so you get moving fast and still end up with a real finished result.
1) Start with enamel basics and the style overview
You begin with a quick intro that covers the practical side of enamel jewelry. You’ll hear a brief sense of where enamel jewelry comes from, plus what enamel is and why it’s used in jewelry making. You’ll also get an overview of techniques and styles such as cloisonné and plique-à-jour, so you’re not just copying one example. The goal is to give you a map of what you’re making and why each step matters.
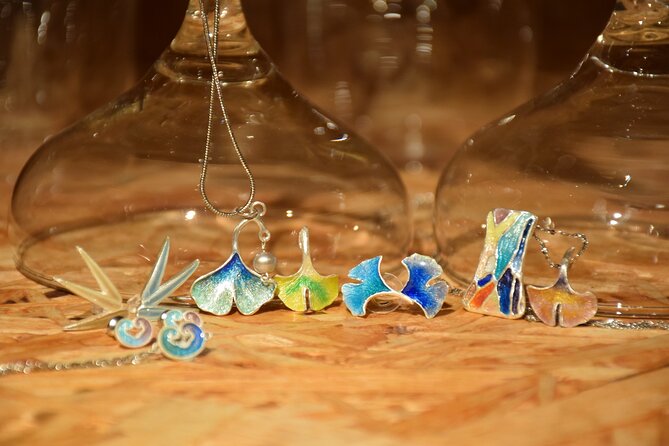
You’ll also see previous works made by others. That’s surprisingly helpful because enamel can look different after firing, and seeing finished outcomes helps you plan your own colors and placement.




2) Materials and tools: what you’ll use (and what that means)
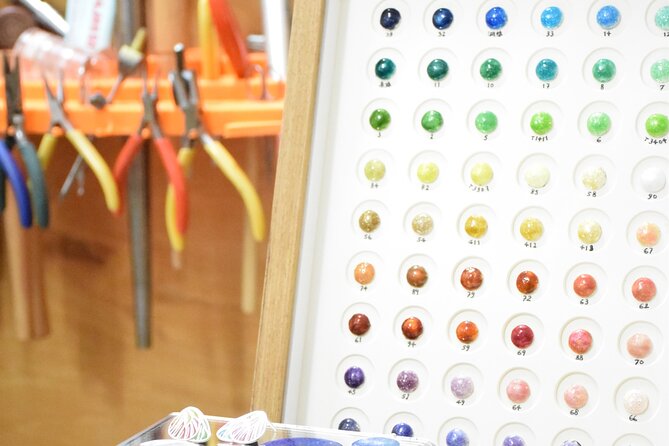
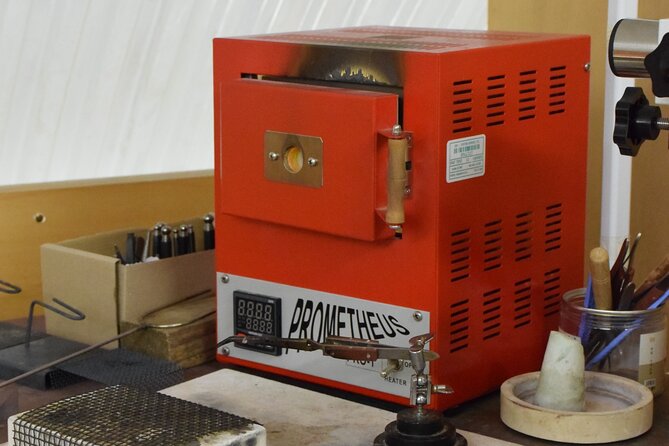
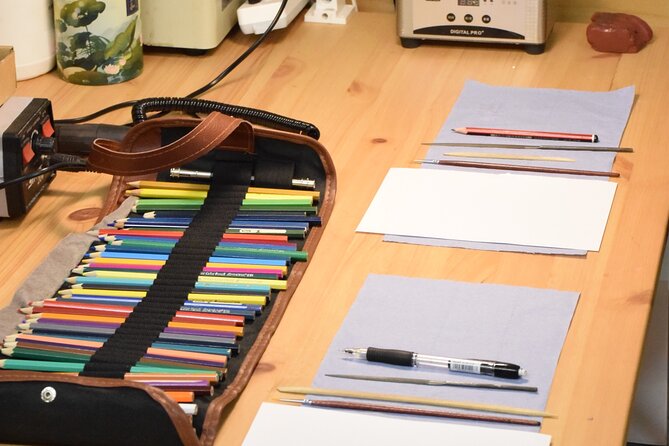
Next comes the practical kit. You’ll work with fine silver blanks and the tools that support shaping and finishing, plus the enamel color palette and color lead. You’ll also use paper and pencil for sketching, sandpaper for surface prep, and polishing compound for the final glow. The class includes tools like files and cutters, and it also includes access to the kiln and the rotary micromotor.
Why this matters for you: in a lot of workshops, people waste time figuring out basic handling. Here, the tools are part of the lesson, so you can focus on learning how to place enamel powder and build layers.
3) Choose your blank design: 40 options to pick from
You’ll select your base from 40 different types of designs. This is a real decision point. You’re choosing the shape that will limit (or enable) your color plan. If your design has more cut lines or compartments, you’ll likely need to think differently about how to layer powder and where colors will land after firing.
Then you file the blank. Filing isn’t glamorous, but it’s key for a smooth result later. The class includes guidance here, so even if you’ve never shaped metal before, you’re not stuck guessing.
4) Design and sketch before you touch enamel
After shaping, you sketch your layout. This is one of the best parts for beginners because enamel mistakes can’t be undone like paint can. A sketch helps you commit to a plan before the enamel goes on. It also makes the color decisions feel less random.
If you tend to overthink crafts, this step can be a relief. You’re given a process. You’re not inventing everything from scratch.
5) One-on-one guidance: enamel powder, color blending, and layering
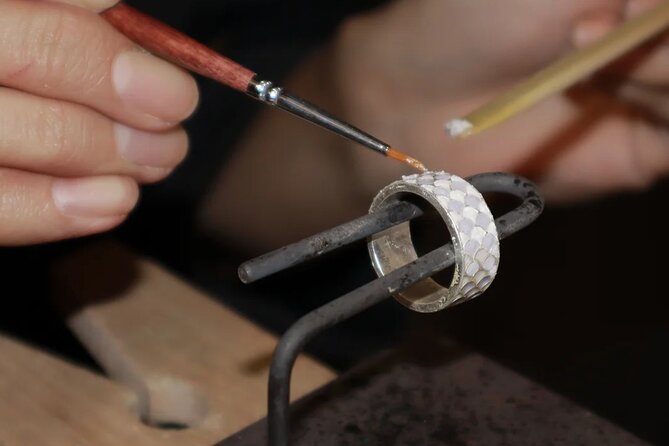
This is where the class earns its reputation. You’ll get demonstration and personalized help applying enamel powder, with coaching on color blending, layering, and how to get the effect you’re aiming for. That one-on-one attention is especially valuable because enamel behaves in a very specific way when it heats.
The instructor also helps you refine your design concept if your first plan isn’t landing how you imagined. You’re not stuck with a single formula, and you’re not left alone to figure it out.
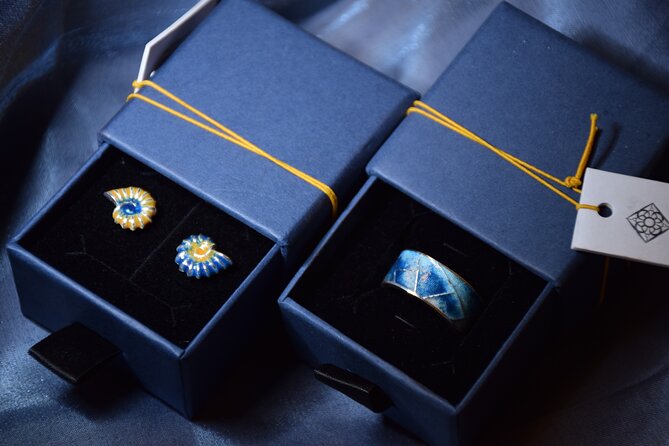
From a past participant’s experience, this is the moment they loved most. They went home with pieces like a pin and necklace they actually wanted to wear, not just keep in a drawer.
6) Kiln time: baking the enamel
Once your enamel is placed, your piece goes into the kiln to bake. This step is where enamel transforms from powder to a glassy surface bonded to the metal. It’s also why the workshop stays focused: you can’t rush firing, and you can’t skip it if you want a durable finish.
7) Finishing and polishing: the final “how it should look” step
After the firing, you finish and polish. This part makes a big difference. Enamel can look good even before polish, but polishing is what makes the piece feel truly finished—smooth edges, a nicer metal shine, and that clean final look that makes it ready to wear.
At the end, you return to the same meeting point.
What you actually learn: cloisonné basics without the heavy jargon
Enamel can sound technical at first, but this class keeps it practical. The lesson gives you enough terminology—like cloisonné and plique-à-jour—to understand what you’re seeing, without turning the whole session into a lecture.
Here’s what you’ll take away even if you don’t remember every term later:
- how enamel color placement affects the final look after firing
- how layering changes depth and contrast
- why your sketch plan helps when the enamel turns solid in the kiln
And because you’re working with real tools (not just craft substitutes), you learn the physical habits: surface prep, careful powder placement, and a finishing routine that makes the work feel professional.
If you’re worried you’ll be “behind” because you’re a beginner, don’t. The class explicitly welcomes beginners, and the instruction style is hands-on. That’s also why the small group size matters.
Tools, inclusions, and the extras that cost money
Let’s talk value the honest way: the included tools are a big part of the cost. This workshop includes the kiln and equipment like the rotary micromotor, plus files, cutters, sandpaper, polishing compound, and the enamel supplies needed for your project.
What’s not included are add-ons you might want after you’ve made your first piece. The listed extras include:
- Silver chains: £10
- Medium silver blanks: £20
- Large silver blanks: £50
So, if you’re picturing a wearable necklace from day one, check how your project is planned. If you only want one finished piece, you can keep it simple. If you want a bigger upgrade, you can budget for chain or larger blanks.
Tip: decide in advance what you want most—a pin, a pendant, or a necklace. Enamel is fast enough to make one great piece in two hours, so you’ll enjoy the session more if you’re not making last-minute decisions about the finished form.
Where it happens: Zoey Filigree in Bedlam Mews (SE11 6DF)
The meeting point is at Zoey Filigree, Bedlam Mews, London SE11 6DF. The class starts at 2:00 pm and ends back at the meeting point.
You’ll want to arrive ready to make, not just ready to look. Wear something you’re comfortable with while working around tools and enamel powders. Bring your patience for “tiny steps,” because filing, sketching, and layering are what build the final result.
Good news: the location is near public transportation, so you don’t have to fight London for a parking spot.
And one more practical note: the studio allows service animals.
Group size reality: intimate most days, bigger on special dates
The highlight says the class runs as a small group, ideally no more than four in the studio. At the same time, the activity lists a maximum group size of eight travelers. That lines up with the idea that this is meant to feel hands-on and personal.
On at least one special event date, a participant noted the group was larger and it felt a bit chaotic. The good part is that it was still a strong experience and they left with pieces they loved. Still, if you’re the type who wants maximum one-on-one attention, aim for a regular weekday-style slot rather than a holiday special.
Who should book this enamel jewellery class
You’ll probably love it if you’re one of these people:
- You want a craft class with an actual wearable outcome.
- You’re curious about enamel techniques like cloisonné and plique-à-jour, but you don’t want a long-term commitment.
- You learn best by doing, with an instructor walking you through the tricky parts—especially color blending and layering.
- You’re traveling solo or as a couple and want a small-group activity with real focus.
You might not love it as much if you expect a huge creative free-for-all. This workshop is structured for success in a tight time window. That’s a plus for most beginners, but if you’re looking for unlimited options and a long studio session, you may want a longer class instead.
Price and value: is $94.10 a fair deal?
At $94.10 per person, you’re paying for three things that matter in craft classes: instruction, equipment, and materials. This workshop includes the practical tools and the firing step via the kiln. Those aren’t “nice to have.” They’re the heart of enamel jewelry.
You also get a clear path: choose a design, file and sketch, apply enamel powder with guidance, bake, then polish. You’re not paying for a vague studio hangout.
The only cost you might add is for display or extra parts—like a chain or larger blanks—if you want to go beyond your base project. Since those items are listed with set prices, you can make a budget call before you start.
Overall, this is one of those activities where the price feels reasonable because you walk out with a finished piece and the knowledge of how to recreate the process.
Should you book this enamel jewellery making class?
Yes, if you want a short London craft experience with real results. This class is built for beginners, runs in a small group, and includes the tools and kiln time needed to turn enamel powder into a finished jewelry piece. The one-on-one guidance on color blending and layering is the part that makes it click—especially if you’re nervous about making mistakes.
I’d skip it only if you specifically want a long, open-ended studio session or you’re traveling on a special date where the group may be larger and attention can feel diluted. Otherwise, it’s a smart use of an afternoon in London: you’ll learn something, make something, and leave with a piece you can actually wear.
FAQ
How long is the enamel jewellery class in London?
The class runs for about 2 hours.
What group size can I expect?
The class highlights an intimate group of no more than four. The activity also lists a maximum of eight travelers.
Where do I meet for the workshop?
You meet at Zoey Filigree, Bedlam Mews, London SE11 6DF.
Is the class offered in English?
Yes, the workshop is offered in English.
Is a mobile ticket provided?
Yes, the class uses a mobile ticket.
What’s included in the $94.10 price?
All materials and tools are included, including equipment such as the kiln and rotary micromotor.
What extras cost extra?
Silver chains cost £10, and medium silver blanks cost £20. Large silver blanks cost £50.
When will I get confirmation after booking?
You should receive confirmation at the time of booking, unless you book within 7 days of travel. In that case, confirmation arrives within 48 hours, subject to availability.
More Workshops in London
- London: Traditional English Scone Making and Tea Workshop
★ 5.0 · 702 reviews - London: East End Street Art Tour and Spray Painting Workshop
★ 4.8 · 297 reviews - London Traditional English Scone Making and Tea Workshop
★ 5.0 · 271 reviews - London: Half-Day Street Art Tour and Workshop
★ 4.9 · 172 reviews - London: Traditional Scone Making Workshop
★ 4.7 · 129 reviews
More Tour Reviews in London
- From London: Harry Potter Warner Bros Studio Tour
★ 4.7 · 26,588 reviews - London: Westminster to Greenwich River Thames Cruise
★ 4.5 · 22,836 reviews - Magical London: Harry Potter Guided Walking Tour
★ 4.7 · 22,044 reviews - London: Madame Tussauds London
★ 4.6 · 20,915 reviews - London: Warner Bros. Studio Harry Potter Tour & Branded Bus
★ 4.7 · 19,194 reviews
Just reviewed around London





Workshops, compared.
 ★ 5.0Traditional English Scone Making and Tea WorkshopFrom $45702 reviews
 ★ 4.8East End Street Art Tour and Spray Painting WorkshopFrom $50297 reviews
★ 5.0London Traditional English Scone Making and Tea WorkshopFrom $48271 reviews
 ★ 4.9Half-Day Street Art Tour and WorkshopFrom $60172 reviews
 ★ 4.7Traditional Scone Making WorkshopFrom $80129 reviews
 ★ 5.0Street Art Tour and Spray Painting Workshop in LondonFrom $5398 reviews
 ★ 5.0Street Art Walking Tour and Workshop in LondonFrom $7258 reviews
3 Hour Chinese Dumpling Cooking Class for 2-6 people in LondonFrom $11744 reviews
Browse the lists this tour appears in