
Reviewed · PHOTOGRAPHY SESSIONS
Discover Photography
Photography gets way easier once you control it.
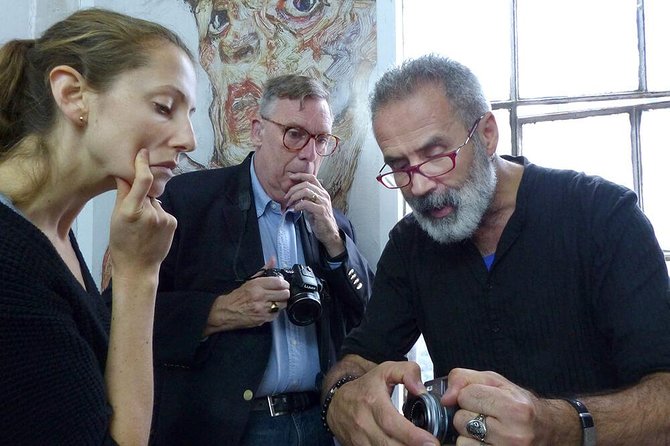
This hands-on course at Westland Place Studios turns a camera full of dials into real creative tools, not mystery buttons. I like the focus on manual settings and the way the instructor keeps the group moving so you actually practice, not just watch. The course also covers the practical stuff that makes a photo look intentional, like white balance and how lenses change perspective.
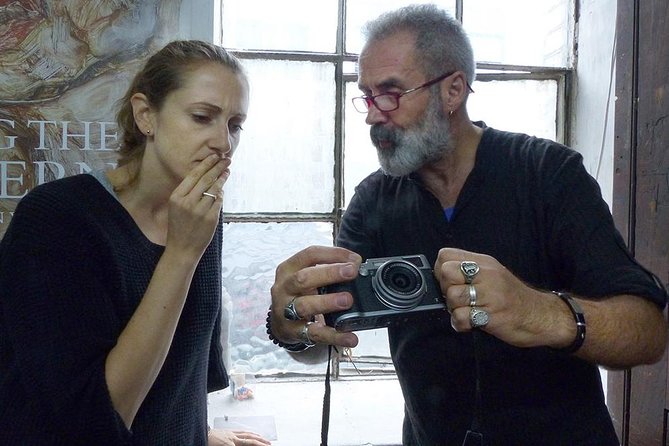
Two things I really liked were the small group size (up to 12) and the clear, step-by-step teaching from an award-winning photographer such as Vehbi Koca. The other big win is that you learn the logic behind settings like aperture, shutter speed, and ISO, so you can repeat results later on your own trip.
One drawback to consider: you’ll get the most out of this only if you have a camera that supports manual control. If you’re using a fully locked-down device with no manual settings, you might feel limited compared with what the class is designed for.
In This Review
- Key highlights at a glance
- Where Westland Place Studios fits into your camera learning
- What you’re actually learning (and why it sticks)
- The exposure triangle, explained for real life
- Aperture: more than just brightness
- Shutter speed: motion control and steadier results
- ISO: the exposure partner
- Switching between automatic and manual without getting stuck
- Lenses, focal length, and perspective: your camera’s attitude adjustment
- White balance and color temperature: fix the “wrong light” problem
- Depth of field and composition: directing attention fast
- The practical exercise: learning by doing, not just watching
- What the group size and instructor style mean for you
- Price and value: is $95.80 actually a good deal?
- Camera requirements: who gets the most out of it
- Practical expectations: what your session will feel like
- Should you book Discover Photography in London?
- FAQ
- What’s the duration of Discover Photography?
- Where does the course start and end?
- How many people are in the group?
- What type of camera do I need?
- What will I learn about camera settings?
- Is there a practical exercise?
- What are the age requirements?
- Is the booking refundable?
Key highlights at a glance
- Small group of 12 max, so you can ask questions and keep up with the practical parts
- Aperture + shutter speed lessons tied to an actual hands-on exercise
- Manual and semi-automatic modes, including how and when to switch between them
- Lens basics that affect your images, like focal length, angle of view, and perspective
- White balance and color temperature so your photos stop looking like they were shot under a permanent filter
Still deciding? A handful more London outings we rated
- London: Private Photoshoot with Video Clip Option
★ 4.8 · 182 reviews - Professional Photoshoot in London Photographer
★ 5.0 · 102 reviews - Private landmarks photoshoot for families and couples
★ 5.0 · 92 reviews - London: Private Landmark Tour with Professional Photographer
★ 4.7 · 91 reviews
Where Westland Place Studios fits into your camera learning
The session starts and ends at Westland Place Studios at 11 Westland Pl, London N1 7LP. That matters more than you might think. A fixed, central meeting point keeps the class tight, and it means you’re not spending your limited time hunting for instructions.
You’ll also get a mobile ticket, which is convenient for London. In practice, that lets you show up, get settled quickly, and focus on the camera rather than logistics.
The course runs about 2 hours 30 minutes, which is long enough to teach real fundamentals and short enough that you won’t get worn down. For beginners, that sweet spot is huge: you learn enough theory to make choices, then you practice before the details evaporate.
What you’re actually learning (and why it sticks)
This beginner photography course is built around one simple goal: help you operate your digital camera with confidence. You’re not just handed a checklist of settings—you learn how each one changes the photo, then you try it while an instructor guides you.
You’ll cover:
- Lenses and composition
- Colour temperature and white balance
- Semi-automatic and manual modes
- Depth of field
- How aperture and shutter speed affect an image
- Focal length, angle of view, and perspective
- A practical exercise focused on aperture and shutter speed
Here’s why this matters for travel photos: camera settings aren’t random. Once you understand the relationship between exposure and creative effects, you start shooting with intent. Instead of hoping for good light, you can adjust the camera to match the scene.
The exposure triangle, explained for real life
The course puts aperture, shutter speed, and ISO in the same conversation. That’s the key. If you only learn one dial, your photos still come out inconsistent. When you learn how they work together, you can decide what matters most for the shot you want.

Aperture: more than just brightness
You’ll learn how aperture affects the image—especially in terms of depth of field. This is the part many people love because it’s instantly visible. Want a subject sharp and the background softer? Aperture is one of your main tools.
In a travel context, this is how you move from generic sightseeing snapshots to portraits, close-ups, and detail shots that look “designed.” You start to see backgrounds as something you control, not something you accept.
Shutter speed: motion control and steadier results
You’ll also learn about shutter speed, with instruction on how it changes the final picture. Even basic improvements here can level up your travel photos fast, because it’s the difference between a photo that feels crisp and one that looks slightly off.
A practical exercise in the session reinforces this, so you’re not just hearing about it—you’re trying it. That’s where the learning sticks.
ISO: the exposure partner
The course includes the relationship with ISO, so you understand where it fits when lighting changes. For travel, this is valuable because light shifts all day—clouds roll in, interiors go dim, and streets get sun one minute and shadow the next. Understanding ISO helps you stop treating low-light photos like a gamble.
Switching between automatic and manual without getting stuck
One of the best parts of the course is that it teaches how to switch between automatic and manual settings. Beginners often panic the moment they try manual mode and the camera no longer “figures it out” for them.
Here, you learn how semi-automatic modes can be used as stepping stones. Then you move into full manual when you want consistent creative control. That approach is practical: you build competence instead of forcing yourself to master everything at once.
This is also why the course length works. You get enough time to try choices, get feedback, and adjust without feeling rushed.
Lenses, focal length, and perspective: your camera’s attitude adjustment
The course isn’t only about settings. You also learn how lenses change what you see—specifically focal length, angle of view, and perspective.
This topic is a game-changer for travel because it explains why photos from the same place look totally different depending on your lens. A wider view includes more context. A longer focal length compresses space and changes how subjects relate to the background.
Even if you mostly use a single lens, this instruction helps you plan your shots better. You stop shooting from the same spot and start thinking about distance, framing, and the story you want the image to tell.
White balance and color temperature: fix the “wrong light” problem
London light can be tricky in photos—mixed tones from buildings, window light, and indoor lighting can make images look too warm, too cool, or just off.
This course covers colour temperature and white balance, which helps you correct that. Instead of accepting odd color casts, you learn how to make the colors match what your eyes remember.
If you’ve ever wondered why a street scene looks yellow in one photo and neutral in another from the same moment, white balance is usually the culprit. Getting a handle on it turns “mystery color” into a controllable creative choice.
Depth of field and composition: directing attention fast
The session includes composition and depth of field, which is a smart pairing. Depth of field controls what the viewer notices. Composition controls where the viewer looks.
So you’re learning both:
- How to separate a subject from the background with depth of field
- How to arrange the frame so the image has a clear focus
This combo is exactly what helps travel photos look less like documentation and more like personal storytelling. It’s also where beginners often surprise themselves. Once the subject is framed intentionally, even familiar scenes start to look more interesting.
The practical exercise: learning by doing, not just watching
There’s a practical exercise built into the course, exploring the effects of aperture and shutter speed. That’s a crucial detail because it changes the whole experience.
In a good workshop, the theory is only step one. You need reps. And because the group is limited to 12 people, it’s easier for the instructor to correct your approach while you’re still experimenting.
This is also where I’ve seen feedback highlight how the instructor keeps things moving and answers questions clearly. Teaching like that matters because manual photography is full of tiny traps. If you don’t know what to ask, you can miss the one adjustment that makes your photo work.
What the group size and instructor style mean for you
A maximum of 12 learners is a sweet spot for a manual settings course. It’s big enough to build energy and compare results, but small enough that you’re not invisible.
From the feedback, the teaching approach is plain-language and encouraging. People have praised instructors like Vehbi Koca for explaining simply, using methods that fit your camera, and making it okay to experiment. That last part is important. Manual settings can feel intimidating. A supportive instructor helps you try, fail a little, then fix it quickly.
Also, expect lots of Q&A. The structure is designed so you can get answers while you’re still working through the concepts.
Price and value: is $95.80 actually a good deal?
The price is $95.80 per person for about 2 hours 30 minutes. On an hourly basis, that’s roughly mid-range for a workshop, and the value depends on one thing: do you practice your camera during the session?
This course is built to do that. You’re not paying just for a lecture. You’re paying for instruction that turns your camera’s manual capabilities into usable skills: exposure basics, lens effects, white balance, composition, and depth of field—plus a practical exercise.
If you’re the kind of person who buys a camera, takes a few photos, then leaves manual mode alone, this is where the money can pay off quickly. Your photos will improve even on trips where you don’t have time to “learn later.”
If, however, you only want casual smartphone tips and you have no interest in manual control, then the value might feel lower. The course is designed around cameras with manual settings.
Camera requirements: who gets the most out of it
To get the best results, you’ll need a DSLR camera or a compact digital camera with manual settings.
That requirement is the biggest deciding factor. If your camera can’t adjust key controls manually, you might still understand the theory, but you won’t be able to apply it the same way. The lesson is structured around helping you operate your camera, including manual and semi-automatic modes.
Minimum age is 18, and children must be accompanied by an adult with a paid ticket. If you’re bringing someone younger, you’ll need to plan for that adult pairing.
Most people can participate, but the camera requirement is real. Before you book, take 2 minutes to check whether your camera has manual settings.
Practical expectations: what your session will feel like
Plan to start with fundamentals, then move into hands-on practice. The course is meant to take you from understanding manual controls to being able to use them creatively.
You’ll also be working with topics that directly impact travel images:
- How settings affect exposure
- How lenses affect perspective and framing
- How white balance affects color accuracy
- How depth of field changes the look and feel of a photo
And because it starts and ends at the same studio, the session feels compact. You’re not stretching the learning across the entire day.
Should you book Discover Photography in London?
Yes, I think you should book this course if you have a DSLR or compact camera with manual settings and you want a structured way to learn. The small group size, the focus on aperture and shutter speed, and the fact that you practice during the session make it a strong value for beginners.
Skip it (or adjust expectations) if you’re hoping for a smartphone-only workflow or you don’t have access to manual controls on your camera. In that case, you may leave understanding the concepts but not feel the same creative shift.
If you’re traveling soon and want your photos to look more intentional rather than accidental, this is a smart use of a half-day.
FAQ
What’s the duration of Discover Photography?
The course runs for about 2 hours 30 minutes.
Where does the course start and end?
It starts and ends at Westland Place Studios, 11 Westland Pl, London N1 7LP, UK.
How many people are in the group?
The class is a small group with a maximum of 12 travelers.
What type of camera do I need?
You’ll need a DSLR camera or a compact digital camera with manual settings to get the most from the course.
What will I learn about camera settings?
You’ll learn about lenses, composition, colour temperature and white balance, semi-automatic and manual modes, depth of field, and how aperture and shutter speed affect images, plus ISO as part of the relationship between exposure settings.
Is there a practical exercise?
Yes. The course includes a practical exercise that explores the effects of aperture and shutter speed.
What are the age requirements?
The minimum age is 18. Children must be accompanied by an adult, and both need paid tickets.
Is the booking refundable?
No. This experience is non-refundable and cannot be changed for any reason. If it’s canceled because a minimum number of travelers isn’t met, you’ll be offered a different date/experience or a full refund.
More Photography Sessions in London
- London: Private Photoshoot with Video Clip Option
★ 4.8 · 182 reviews - Professional Photoshoot in London Photographer
★ 5.0 · 102 reviews - Private landmarks photoshoot for families and couples
★ 5.0 · 92 reviews - London: Private Landmark Tour with Professional Photographer
★ 4.7 · 91 reviews - Professional Private Photoshoot in London
★ 5.0 · 63 reviews
More Tour Reviews in London
- From London: Harry Potter Warner Bros Studio Tour
★ 4.7 · 26,588 reviews - London: Westminster to Greenwich River Thames Cruise
★ 4.5 · 22,836 reviews - Magical London: Harry Potter Guided Walking Tour
★ 4.7 · 22,044 reviews - London: Madame Tussauds London
★ 4.6 · 20,915 reviews - London: Warner Bros. Studio Harry Potter Tour & Branded Bus
★ 4.7 · 19,194 reviews
Just reviewed around London
Photography Sessions, compared.
 ★ 4.8Private Photoshoot with Video Clip OptionFrom $161182 reviews
 ★ 5.0Professional Photoshoot in London PhotographerFrom $305102 reviews
 ★ 5.0Private landmarks photoshoot for families and couplesFrom $16692 reviews
 ★ 4.7Private Landmark Tour with Professional PhotographerFrom $15691 reviews
 ★ 5.0Professional Private Photoshoot in LondonFrom $10963 reviews
 ★ 4.530 Major London Attractions Walking Tour With PhotosFrom $6751 reviews
 ★ 4.7Private travel vacation photoshoot -Romantic SpecialFrom $21150 reviews
 ★ 5.0Private Tour: Night Photography Tour in LondonFrom $33748 reviews
Browse the lists this tour appears in